Managing Complex Pay Items in B2W Estimate with this Time Saving Tip

Working faster is one of the big advantages of construction estimating programs like B2W Estimate. Here is a tip that can help estimators save time by managing complex pay items with many components without having to look at the details of all the different components of an item one by one. The trick is to customize the Item Listing tab grid to show information that can then be reviewed and modified on the grid itself.
Grid Default View
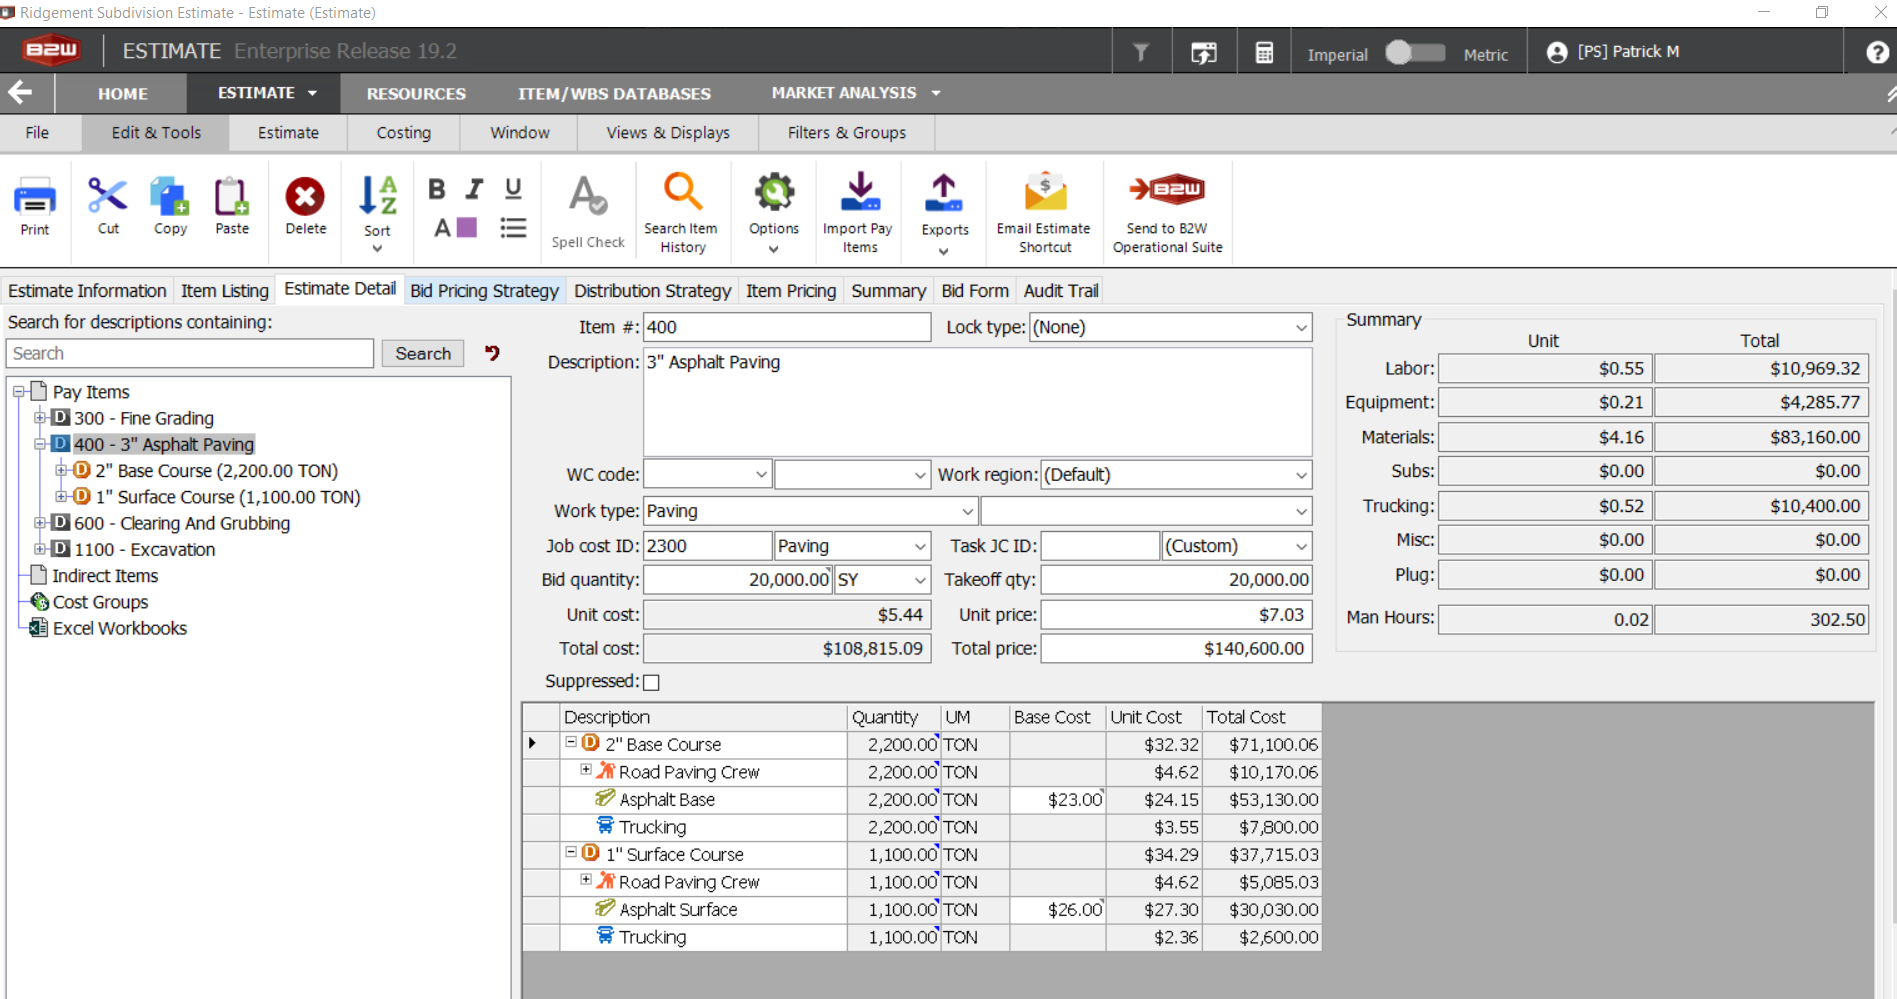
This image shows pay item 400 – 3” Asphalt Paving, and several columns have been added to the grid default view:
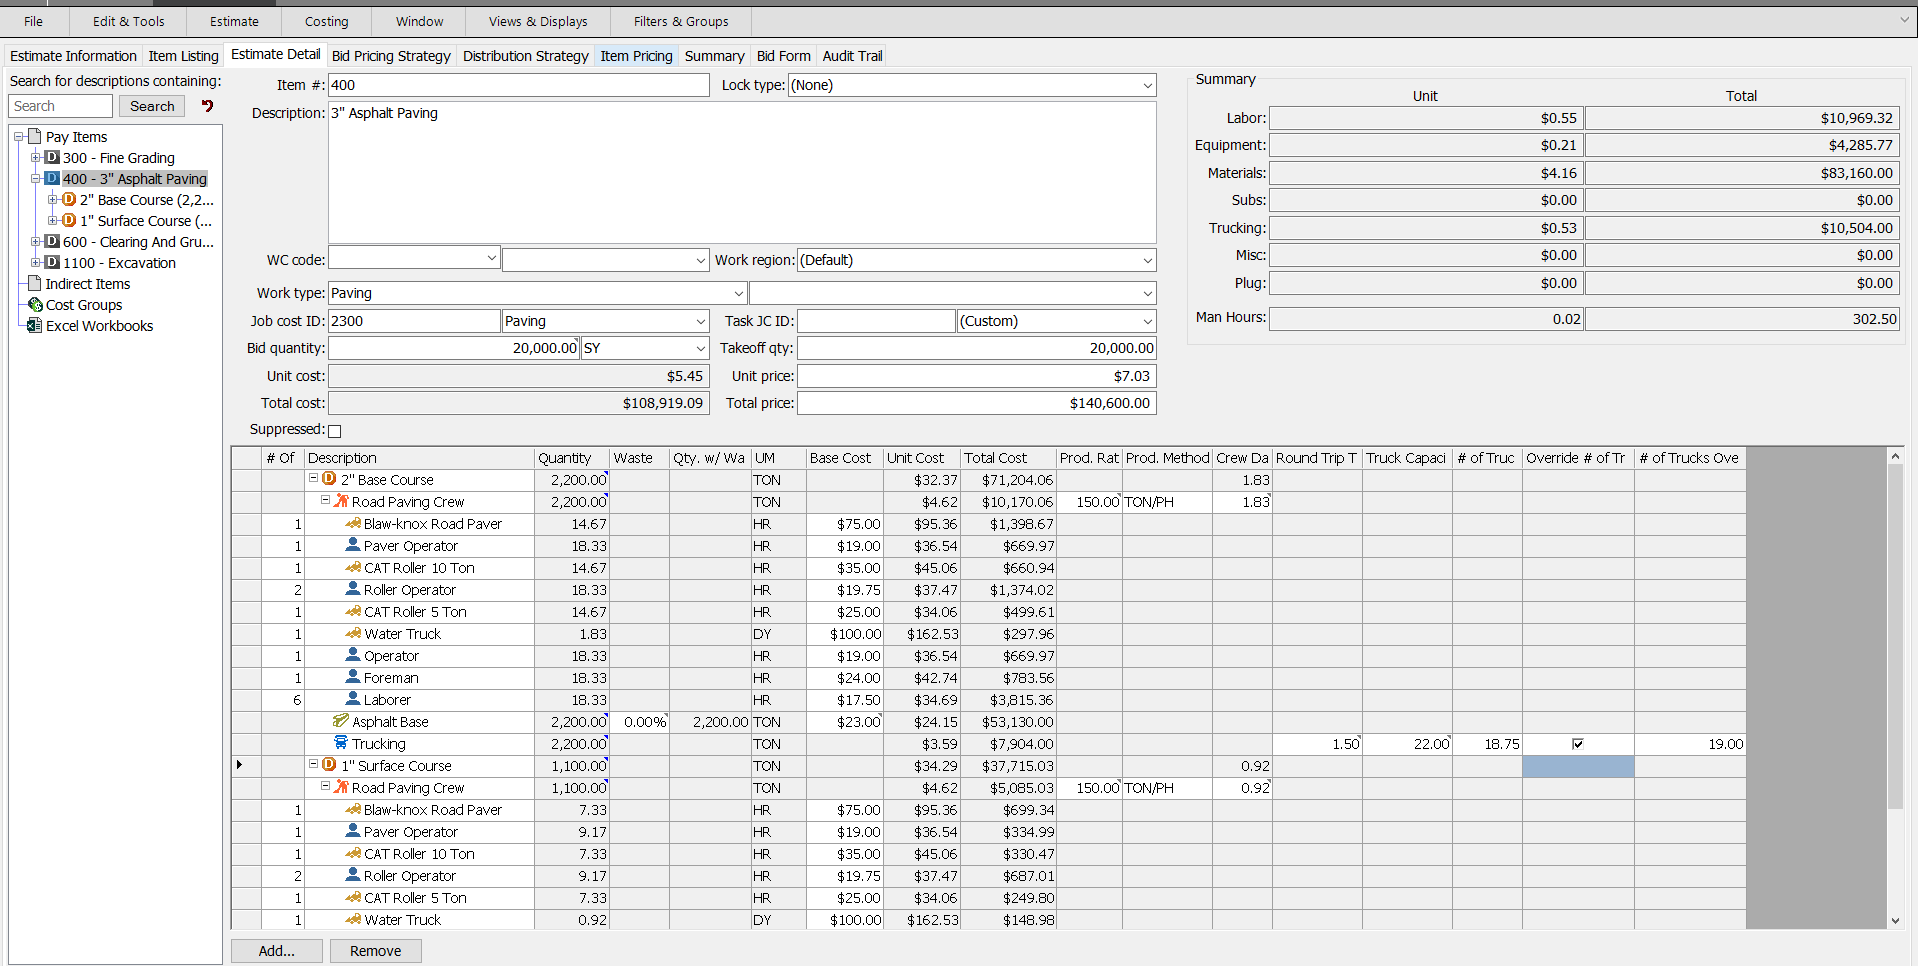
By adding columns, I can see much more information and edit many fields directly from that grid. I also chose to show all levels to let me see all of the components of the item.
Production and Material Information
Columns can be added by right-clicking anywhere on the header row, selecting Customize Column and then clicking Add. For example, I added related production and material information in the image below. Estimators can also order the columns to their liking. I like the column called Number Of to be the first one.
From the grid, I can now adjust the size of my crew size and its productivity without having to go into the detail of the crews. I can just enter the appropriate values in the open field in white.
I also added the Waste factor as well as the Quantity with Waste for the materials, and I can adjust my factor on that screen as well.
Lastly, on this example, I included several of the Trucking fields to help me quickly see and adjust my material trucking.
You can also manage factors and Excel workbook links, when applicable, on this screen by right-clicking any of the fields with the top right caret and selecting Set Value.
Not all tasks can be performed on this screen, but for well-defined items and tasks, it can bring a huge gain in speed when building an estimate. For instance, you can remove components like labor or equipment in a crew by clicking on Remove at the bottom of the screen. To add the same components in a crew, you would need to double click on the crew so that the detail screen shows that crew.
Estimate Detail Tab
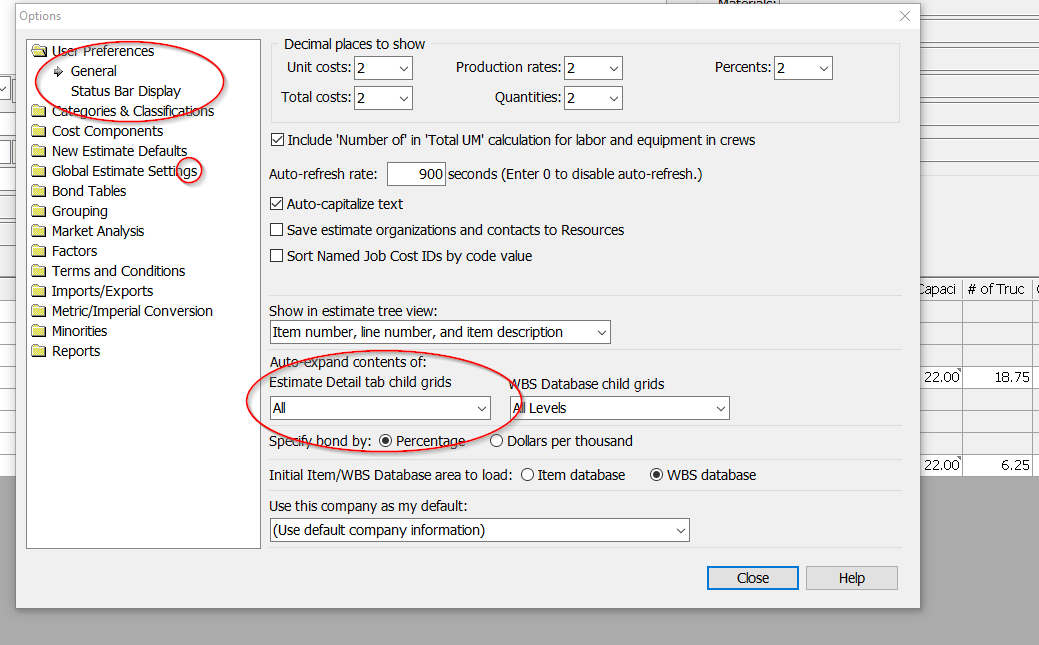
Another tip that makes this feature even more convenient is to change the default value that controls how the content of the Estimate Detail tab expands. Every time you make a change, the way the list is expanded changes back and does not show all of the components. To change that behavior, open the Tools Option or, if you are not in an estimate, simply click Option, go to the User Preferences section and select the General option. On that screen, select All in the Auto expand content of the Estimate Detail tab child grids, as shown below. This will make the grid in Estimate Detail always show you all of the components of any lines selected in the Tree.


